Hey Crafters! I wanted to share my September Design Team project for
Simply Crafty SVGS with you all. When I saw this
Dragonfly Tealight Holder I knew I had to create it because I love home decor projects and dragonflies. I have several photos showing how I put my project together but when you purchase the SVG file you will receive step by step instructions in a PDF format. Also, I am excited to share that you can win this SVG file; details at end of post.
I put this beauty on my mantle and I just love it. And below you can see it lit with a flameless candle.
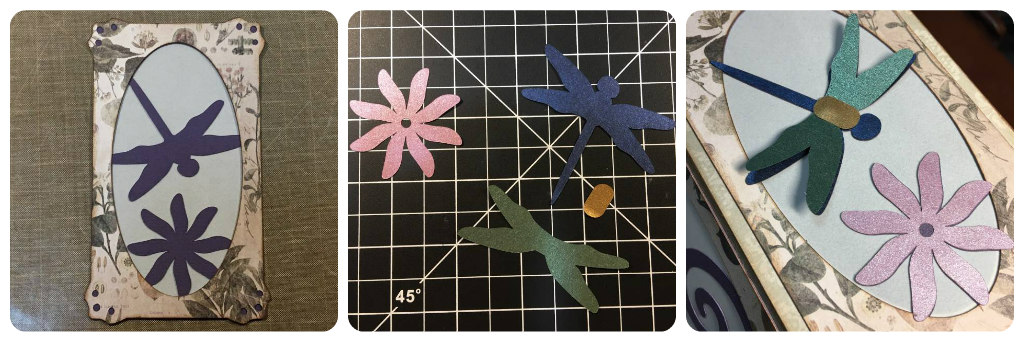
Here is what the dragonfly and flower look like up close. I love how the
Cricut Pearl Paper shimmers. Now I will show you my step by step photos of how I assembled this beautiful piece.
Here are the papers I used.
Cricut Pearl Paper and I used the Craft Smith Botanical Bliss paper pad which gave a vintage look to my tealight holder.
Here are what my cut pieces look like. I imported the SVGS into Cricut Design Space and I altered the size to 6 1/4" (finished) tall from the original 4 1/8" tall (finished). That is what is so great about a project like this you can customize it to whatever you want. Below you can see all the images.
There are many possibilities when creating this project. You can use all dragonfly panels or the swirled panels. Or just use the frames. You could also add different shapes to the openings, like a heart.
First thing I did was add my vellum to my image panels. I found this Plus Glue Tape for vellum on Amazon and I love it (2). As you can see is the third picture you can not see the adhesive...amazing!. I then added the main framed to my panel (4). I did use liquid adhesive for this.
Once the frame was on I added the gorgeous dragonfly and flower; I used
Cricut Pearl Paper.
Next I adhered the panels to the sides. When doing this I highly recommend putting a white piece of paper behind the side which will help you see better. See the difference in picture 1 and 2. I also recommend using a liquid adhesive and bring the side to panel as in picture 1.
Time to start adhering the sides together. I used Scor-Tape because it is very strong and durable. I adhere the Scor-Tape to the side tabs (1) and then adhered the two sides together (2). To connect the last side tab I folded the sides over half way (3) and then brought the right tabs over (4); this helped line it up without any issues.
I then added Scor-Tape to the bottom tabs inside and out (1). I removed the adhesive backer for the side of the tabs and then set my tealight holder upright (2, 3); this will help when you add the bottom inside panel.
Next I added the bottom inside panel (1); it slides right into place. I removed the adhesive backer for the bottom outside tabs (2) and add the bottom outside panel (3). This is not necessary but I felt it gave it a finished look.
So here is my finished project. This would make beautiful decorations for a wedding, bridal shower, baby shower, or birthday. Be sure to visit
Simply Crafty SVGS and you will be amazed at all the products she has available.
Wow you made to end of my long post...sorry. Oh yes, I did mention giveaway. Enter to win a chance to win a
Simply Crafty SVG Dragonfly Tealight Holder svg file. Click on the Rafflecopter link below and follow the directions. You will need to leave a blog post with your e-mail address so I can contact the winner. The giveaway will run from 9/23/17 thru 10/1/17. Good Luck!
Thank you so much for stopping by.
Happy Crafting,
Kimberly Michelle
Clickable Links:
Simply Crafty SVGS store
Simply Crafty SVGS YouTube
Simply Crafty SVGS Facebook
Kimberly Michelle Designs YouTube
Kimberly Michelle Designs Facebook
Cricut Pearl Paper


I love this I hope I win!
ReplyDeleteGreat project, love to see your step-by-step photos.
ReplyDeleteLove all your ideas. Cannot wait to,see more.
ReplyDeleteBeautiful, as always!
ReplyDeleteMy favorite home design-mostly 3D projects like houses and lanterns but I also enjoy paint pouring and trying to paint, so not an artist, but I play one in my craft room. Very excited to find you, you have some fun projects .
ReplyDelete